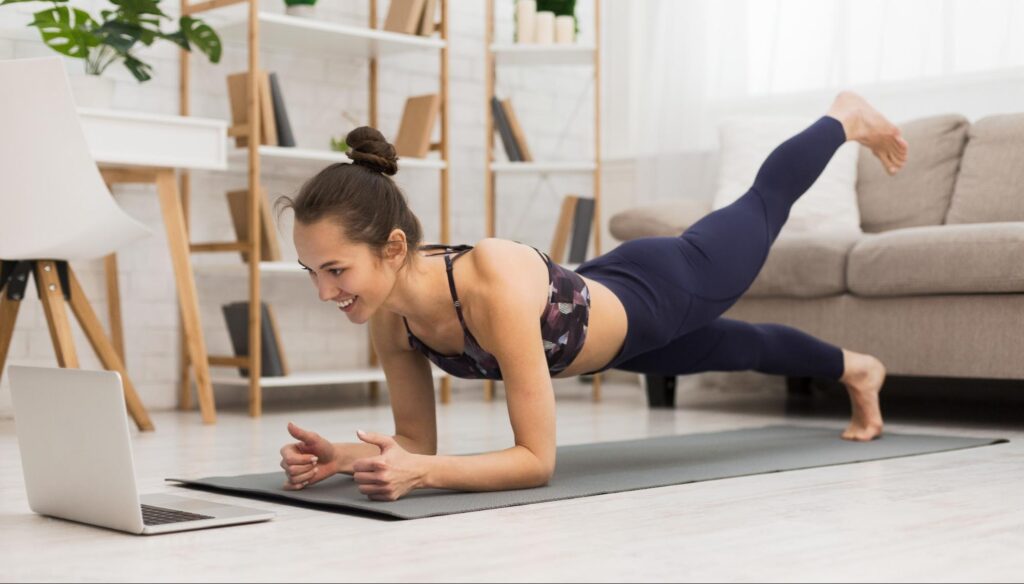
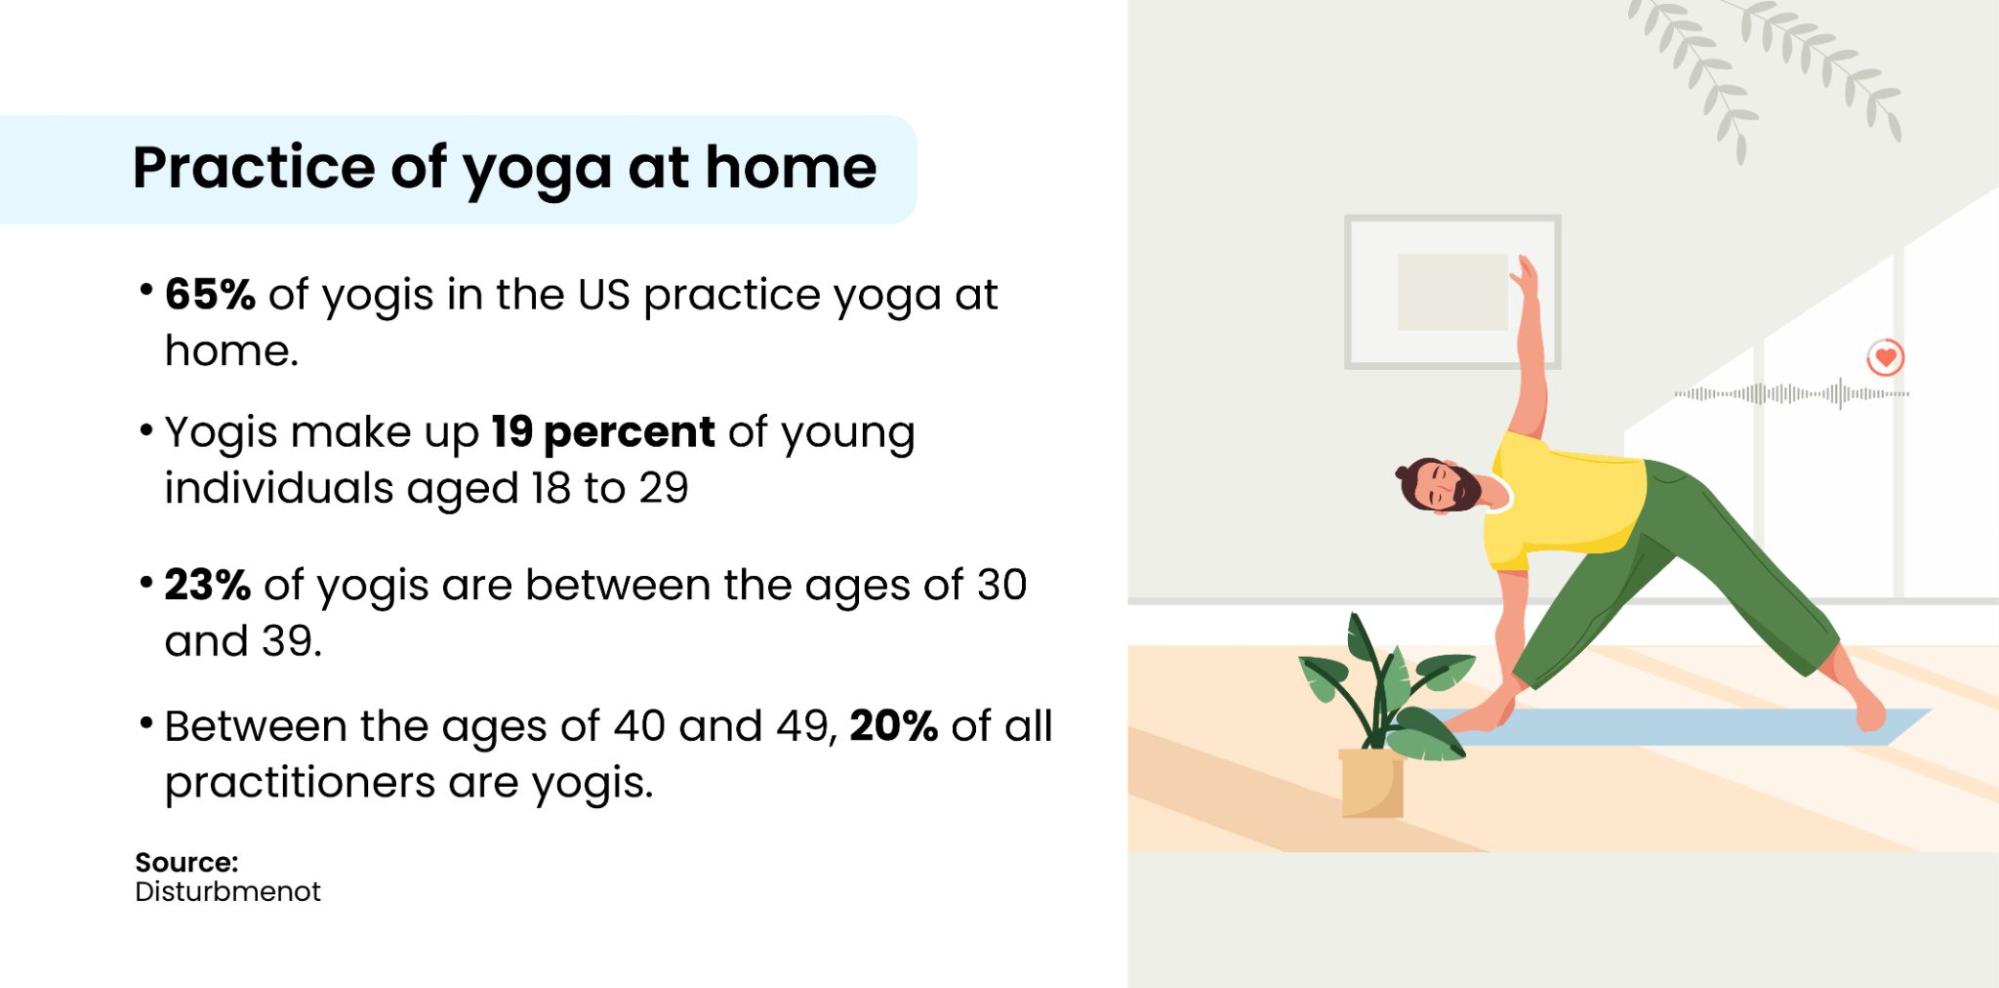
Have you ever wanted to start practicing yoga but weren't sure where to begin? We've put together a list of the basic yoga positions you'll need as a beginner to help you build a firm foundation. You'll be an expert in no time after you learn these fundamentals. 65% of yogis in the US practice yoga at home.
So, lay out that yoga mat and start reaping the physical and emotional benefits that yoga has to offer. Yoga can help you quiet your mind and strengthen your body whether you're young or elderly, regardless of your gender.
Practicing Yoga at Home
Many people are unsure how to perform yoga at home. But it's not as difficult as you may assume. Simply practicing on a regular basis will offer numerous health benefits. Yogis make up 19 percent of young individuals aged 18 to 29, and 23% of yogis are between the ages of 30 and 39. Between the ages of 40 and 49, 20% of all practitioners are yogis.
Here are a few pointers to help you get started at home:
Create a relaxing environment
While there is no such thing as a perfect setting, it is critical that you create one that is as clutter-free and distraction-free as possible.
Find a space with an empty wall
As a beginner, you might find it helpful to find a space with an empty wall to aid you with your balance.
Light some candles
Adding candles or incense to your room may help you feel more relaxed, but this is absolutely optional and up to your personal opinion.
Concentrate on your breathing
Take some deep breaths to relax your body before practicing any yoga.
Rest
Even if you're seeking to improve your strength and flexibility by practicing yoga every day, we recommend taking at least one day off per week to relax.
Purchase a yoga mat
A yoga mat will make any room or location much more comfortable.
Following are 10 fundamental yoga poses that any beginner should know. Poses are the foundation of yoga and the ten things you'll need to know as you begin your yoga journey are:
1. Mountain Pose (Tadasana)
The mountain pose is referred to as an "active pose" because it improves posture and relieves back pain. It assists in the strengthening of the thighs, knees, ankles, tummy, and glutes.
- Begin by standing with your feet together and equally distributing your weight across your feet. Make sure your toes are touching
- Lift your toes and spread them apart, then individually place them back on the mat. Start with your feet slightly apart if you're having problems balancing
- Straighten your legs, but make sure your weight is spread equally between your feet. This will work your quadriceps
- Tuck your tailbone in and keep your hips in line with your body's center. Pull your belly in gently while maintaining the natural alignment of your pelvis
- Push your shoulder blades back and broaden your collarbones to lengthen your torso. Allow your inner arms to rotate slightly outward while keeping your arms straight and fingers extended
- By extending the neck, continue your breathing exercises, and with each breath, unlock the benefits of the mountain pose
- Hold this stance for one minute if possible
2. Raised arms pose (urdhva hastasana)
The raised arms pose is achieved by combining the mountain pose with it. Regularly practicing this position improves respiratory and lung function, increases energy and well-being, strengthens the cardiovascular system, and can help you relax. This stance is good for reducing fatigue, asthma, and gastrointestinal symptoms also.
- To begin, turn your arms outwards so that they are facing away from your torso. Ensure that your thumbs are pointing backwards
- Move your arms to the side and towards the ceiling now. Don't worry about putting both hands together if your shoulders aren't very flexible. When it becomes unbearable, lower down your arms
- Now extend your elbows completely and stretch up through your fingertips. Your thumbs should naturally point down and away from your head
- Slightly tilt your head back, but don't crush the back of your neck. You should be able to see your thumbs in the ideal situation. If you lack this suppleness, don't try to force it; it will come with practice
- Lift your rib cage equally away from the pelvis and lengthen your tailbone towards the floor
- Hold this stance for one minute if possible
3. Standing Forward Bend (Uttanasana)
The standing forward bend has many benefits including reducing stress and mild depression and relieving symptoms of fatigue and anxiety.It also stretches the hamstrings, calves, and hips, it strengthens the thighs and knees, and relieves dyspepsia. The standing forward bend can be beneficial if you have asthma, high blood pressure, infertility, osteoporosis, or sinusitis.
- To begin, stand tall and place your hands on your hips. Bend forward from the hip joints when exhaling. Pull your torso away from your groin when bending forward. In this exercise, it's critical to focus on stretching the front of your torso
- Place your palms and fingertips on the ground slightly in front of your feet or the back of your ankles with your knees straight. If your hip joints are stiff, this may not be possible
- Garland Pose (Malasana)
The garland posture is an excellent introductory yoga exercise for rehabilitating lower back and knee issues. The garland posture also tones the belly and strengthens the core while stretching the ankles, groins, and back torso.
- Squat with your feet as close together as possible to begin. Keep both heels planted on the ground
- Your thighs should now be slightly wider than your body. Exhale and lean forward until your body is positioned between your thighs.
- While moving your palms together, press your elbows on the inside of your knees. Keep your knees from moving forward.
- Hold this position for one minute.
5. High Lunge Pose
Anyone with a major knee injury should avoid doing the high lunge pose. This position, on the other hand, is extremely beneficial for indigestion, constipation, and sciatica. The high lunge stance helps to stretch the groins while also strengthening the legs and arms.
- To begin, stand in the forward bend position (as stated above) with your knees bent
- Step your left foot back and land on the floor with the ball of your foot. Your right knee should be bent at a right angle
- Place your torso on your front thigh and extend it forward while looking forward. Maintain a straight left knee while pushing your left thigh towards the ceiling. Reach for the floor with your left heel
- Hold this stance for one minute before switching to the opposite leg
Key Takeaways
No matter where you begin and what your physical condition is, yoga is always beneficial for everyone. Following the above mentioned practices, you can quickly begin to transform your life. As you start practicing yoga, you will begin to feel motivated by the results.